When Josie from Fabric Godmother invited me to become an ambassador for the latest designs in their exclusive range, I immediately gravitated towards this stunning viscose sateen. As an ambassador I was sent the fabric for free and will get paid for my review, but the opinions I'm sharing are 100% honest.


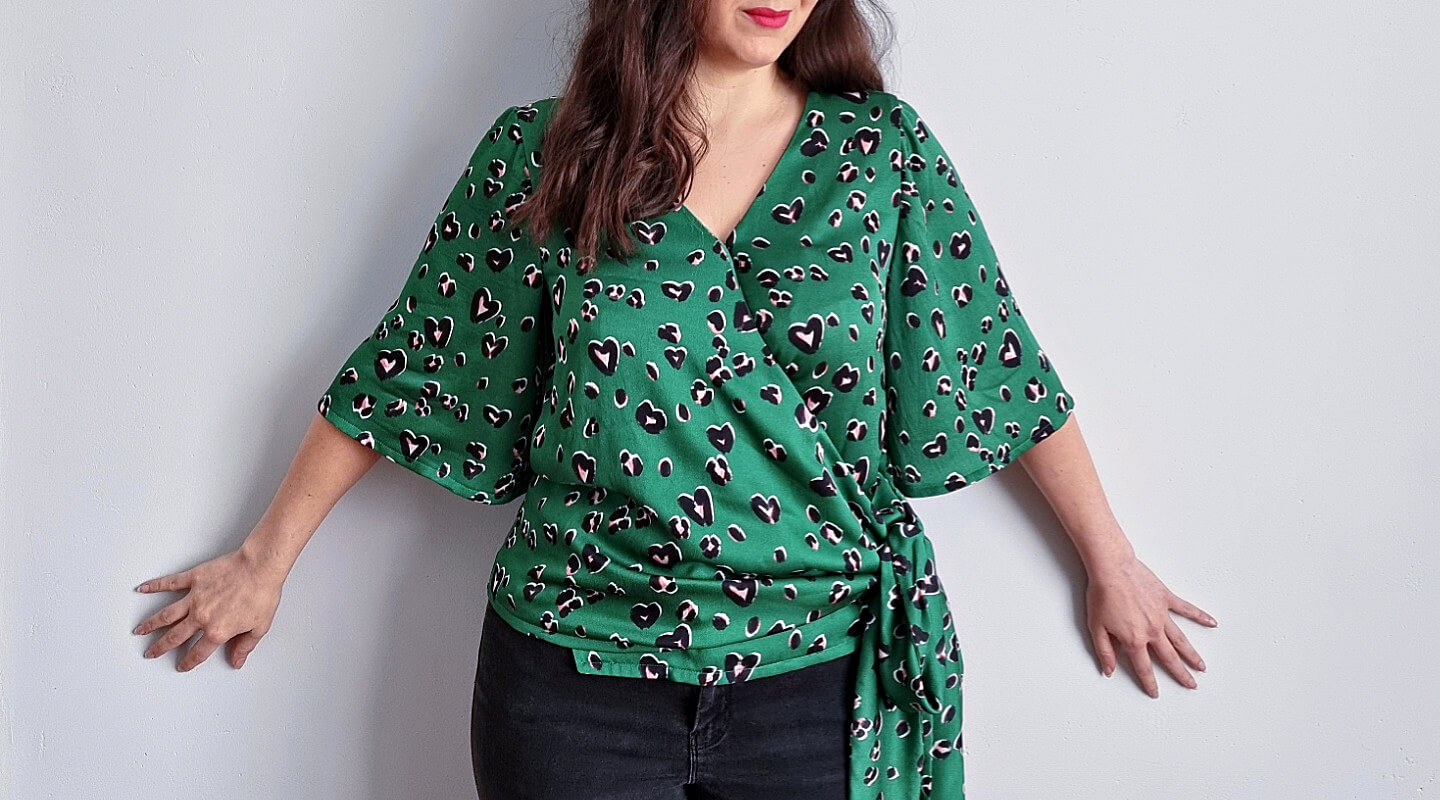
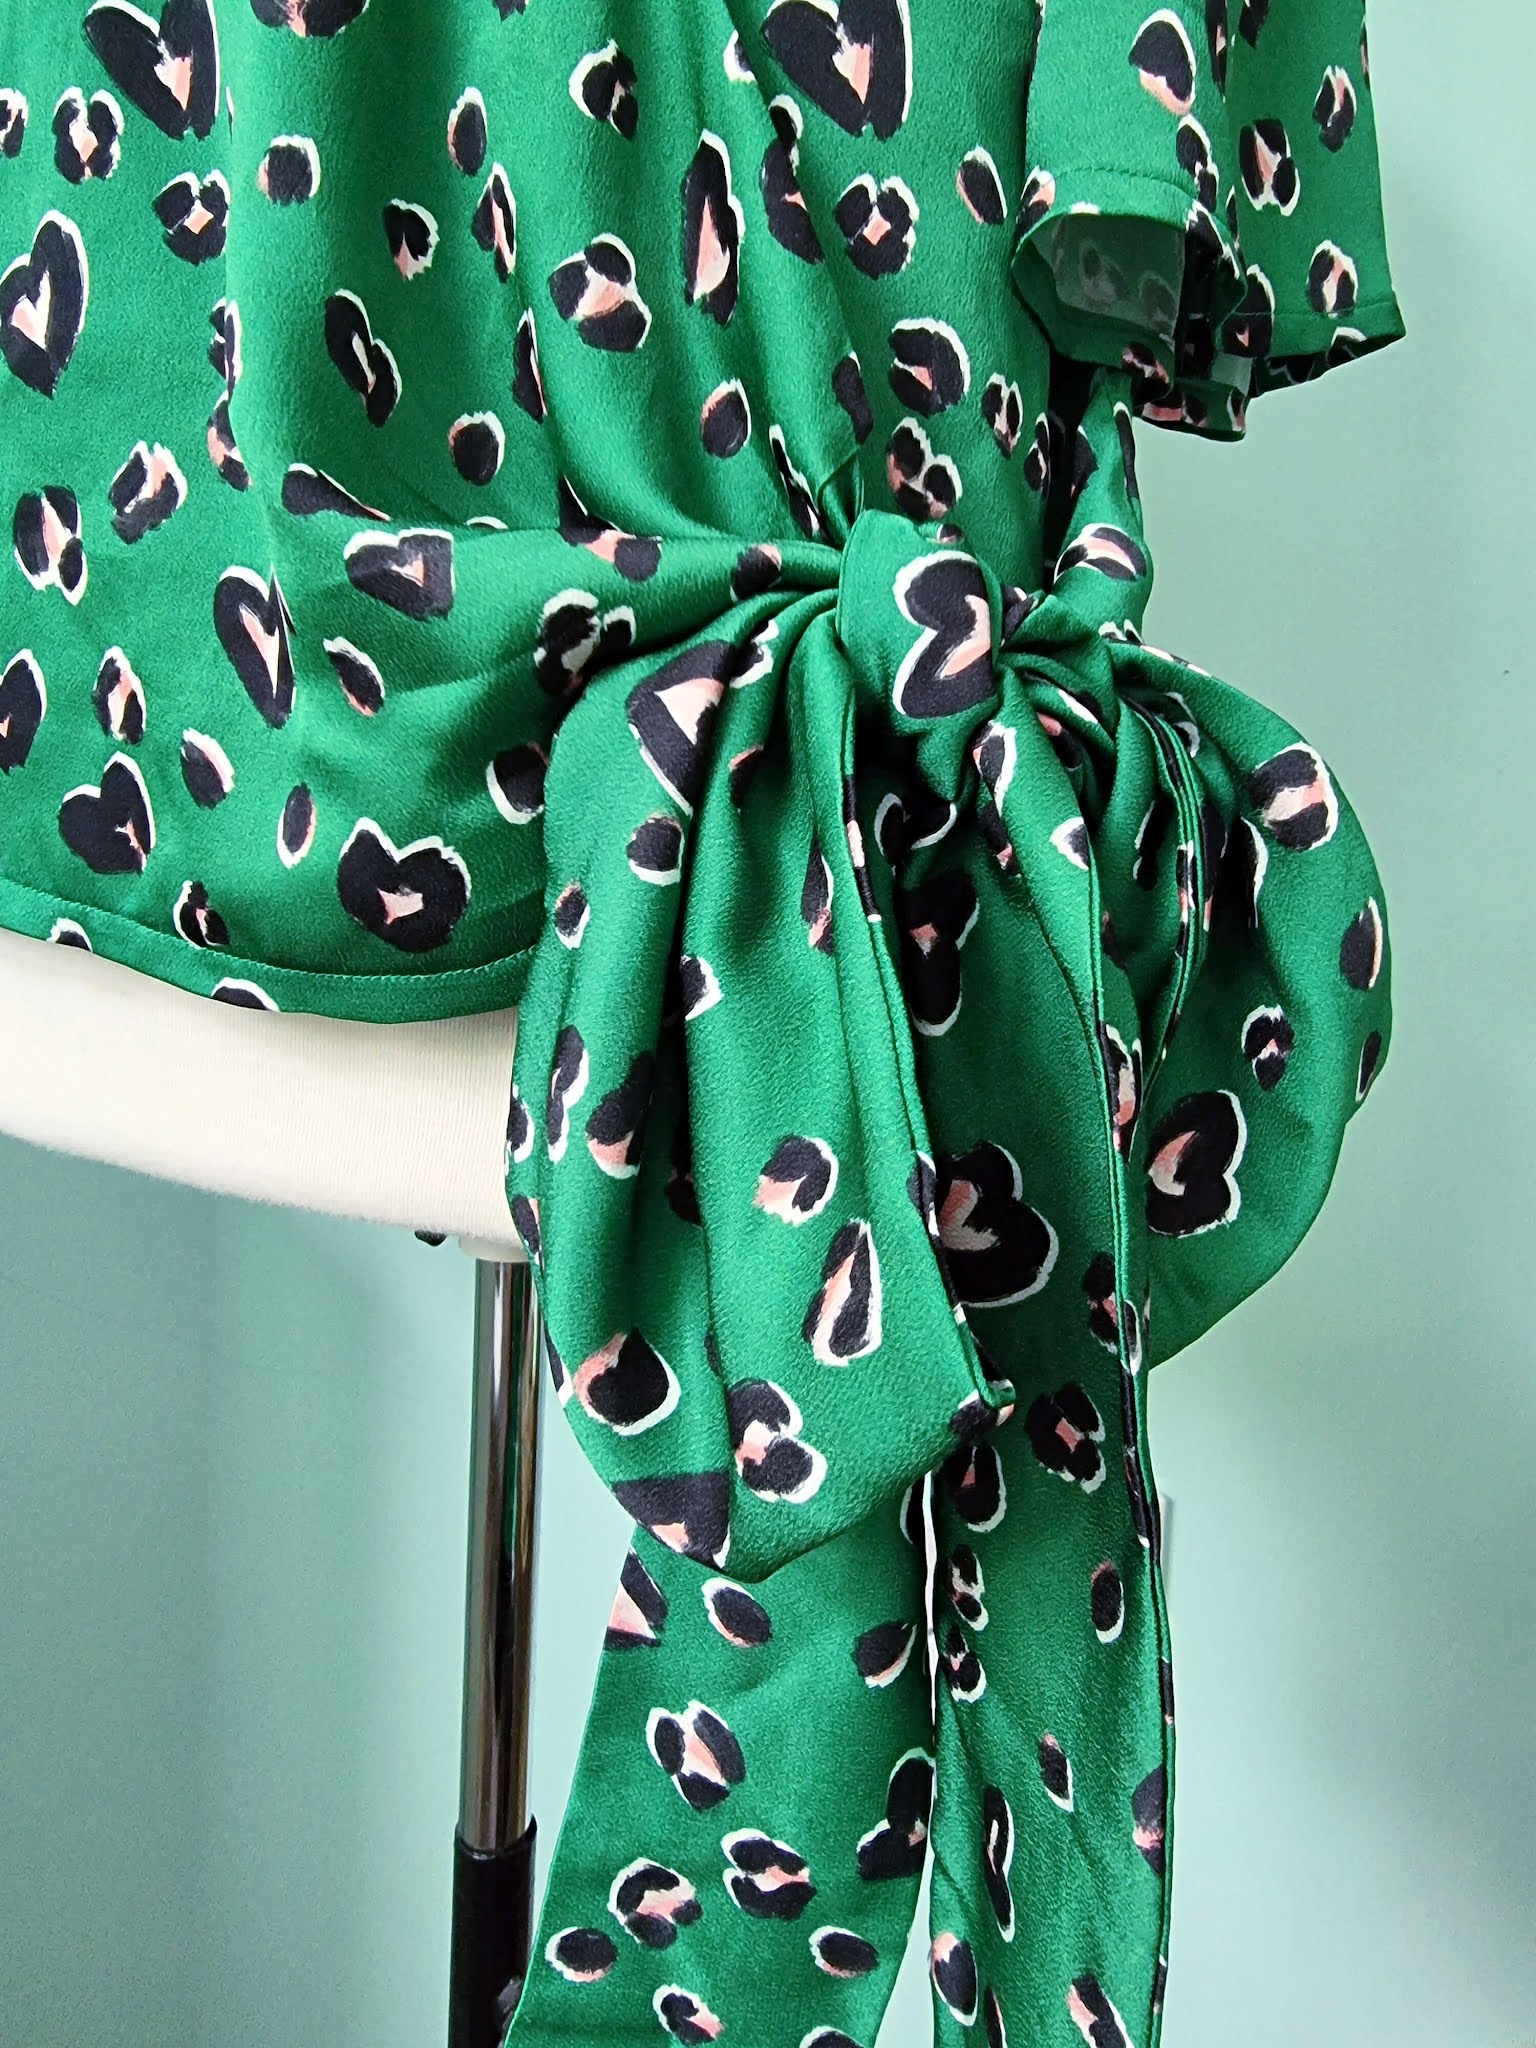
I asked for 1.5m to make a top and it's even more beautiful in person than I could imagine. It's the most vibrant shade of emerald green with the sweetest peachy pink heart print that looks like an animal print from afar. Completely opaque, it's got a lovely drape and weight to it, as well as a satin finish.

Most surprisingly, this fabric holds a press really well, but I'd recommend a cooler setting on your iron. I'd also recommend using a rotary cutter, if you have one, and a fine needle is a must to avoid nasty snags.

I've never been disappointed with the quality of Fabric Godmother's own range and this viscose sateen is absolutely no exception.

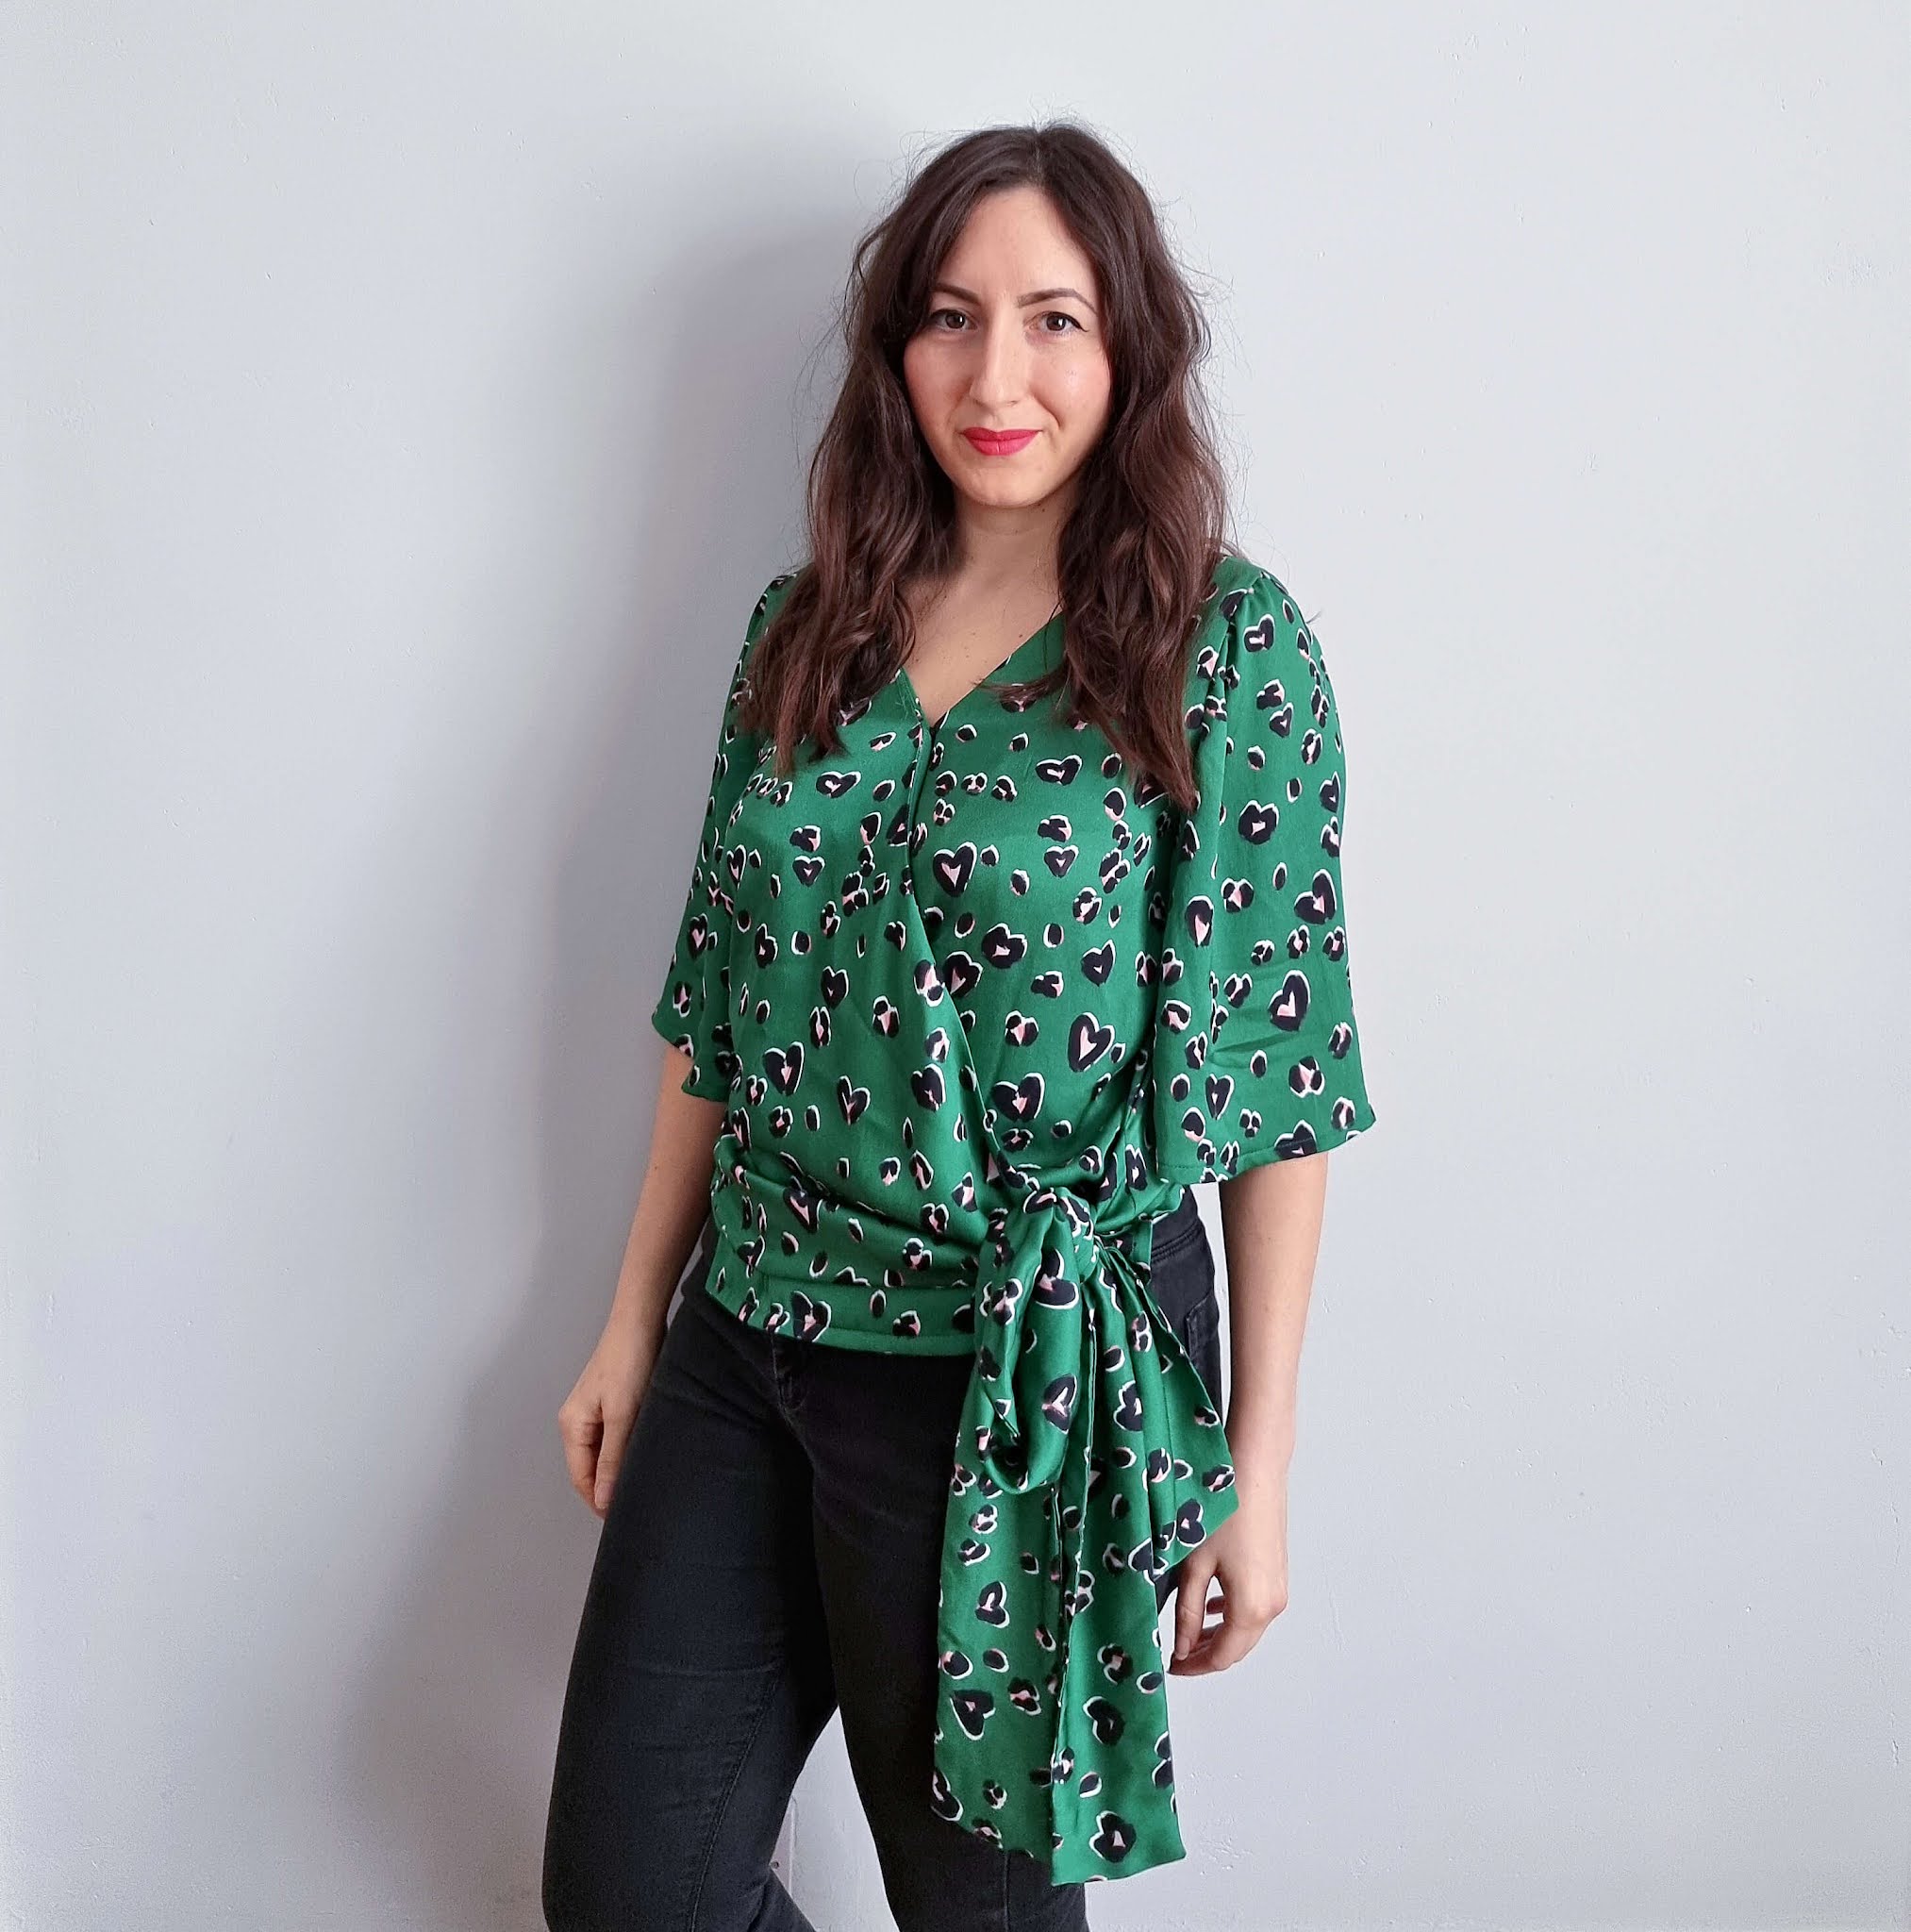
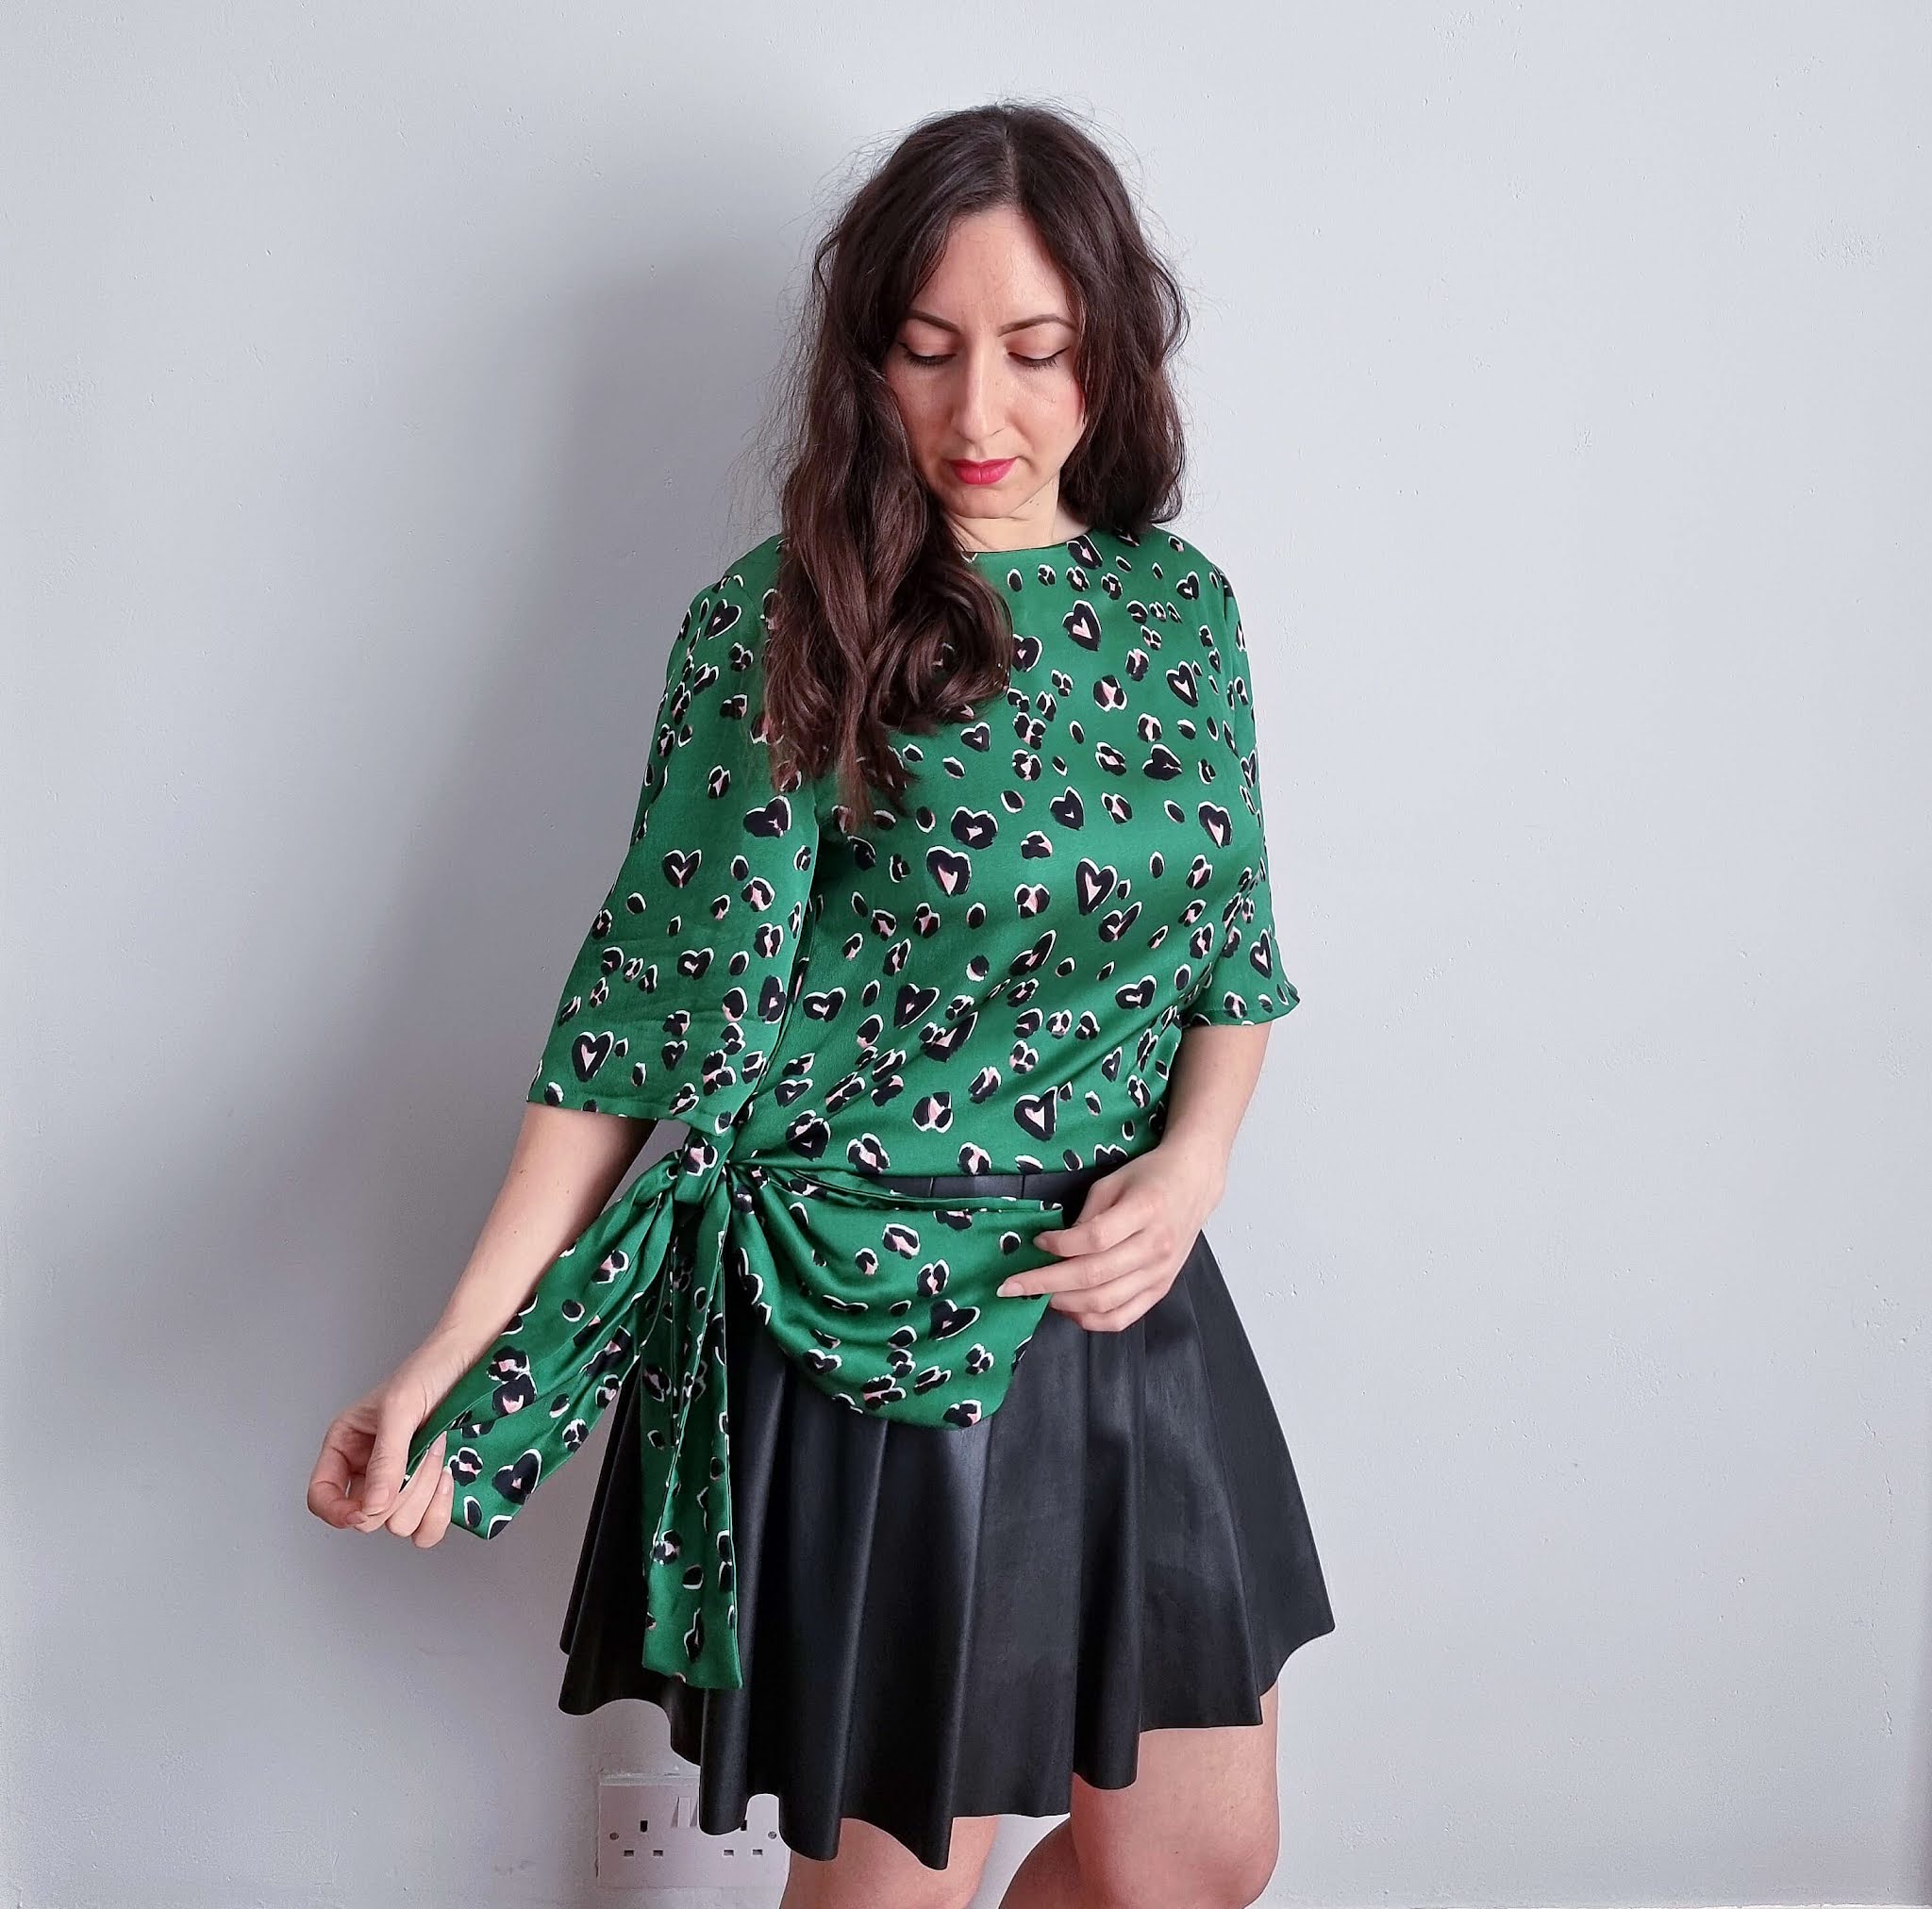
After a bit of pondering, inspiration struck and I knew it just had to become a Papercut Sequence Blouse. I made a straight size 4 (disappointingly, this pattern isn't currently available in a more inclusive size range) with no alterations and the fit is great. 

The pattern is minimum effort for maximum effect, coming together really quickly and easily. As with any wrap garment, modesty is key. This one has you covered with an internal side seam button and a snap fastening along the neckline.


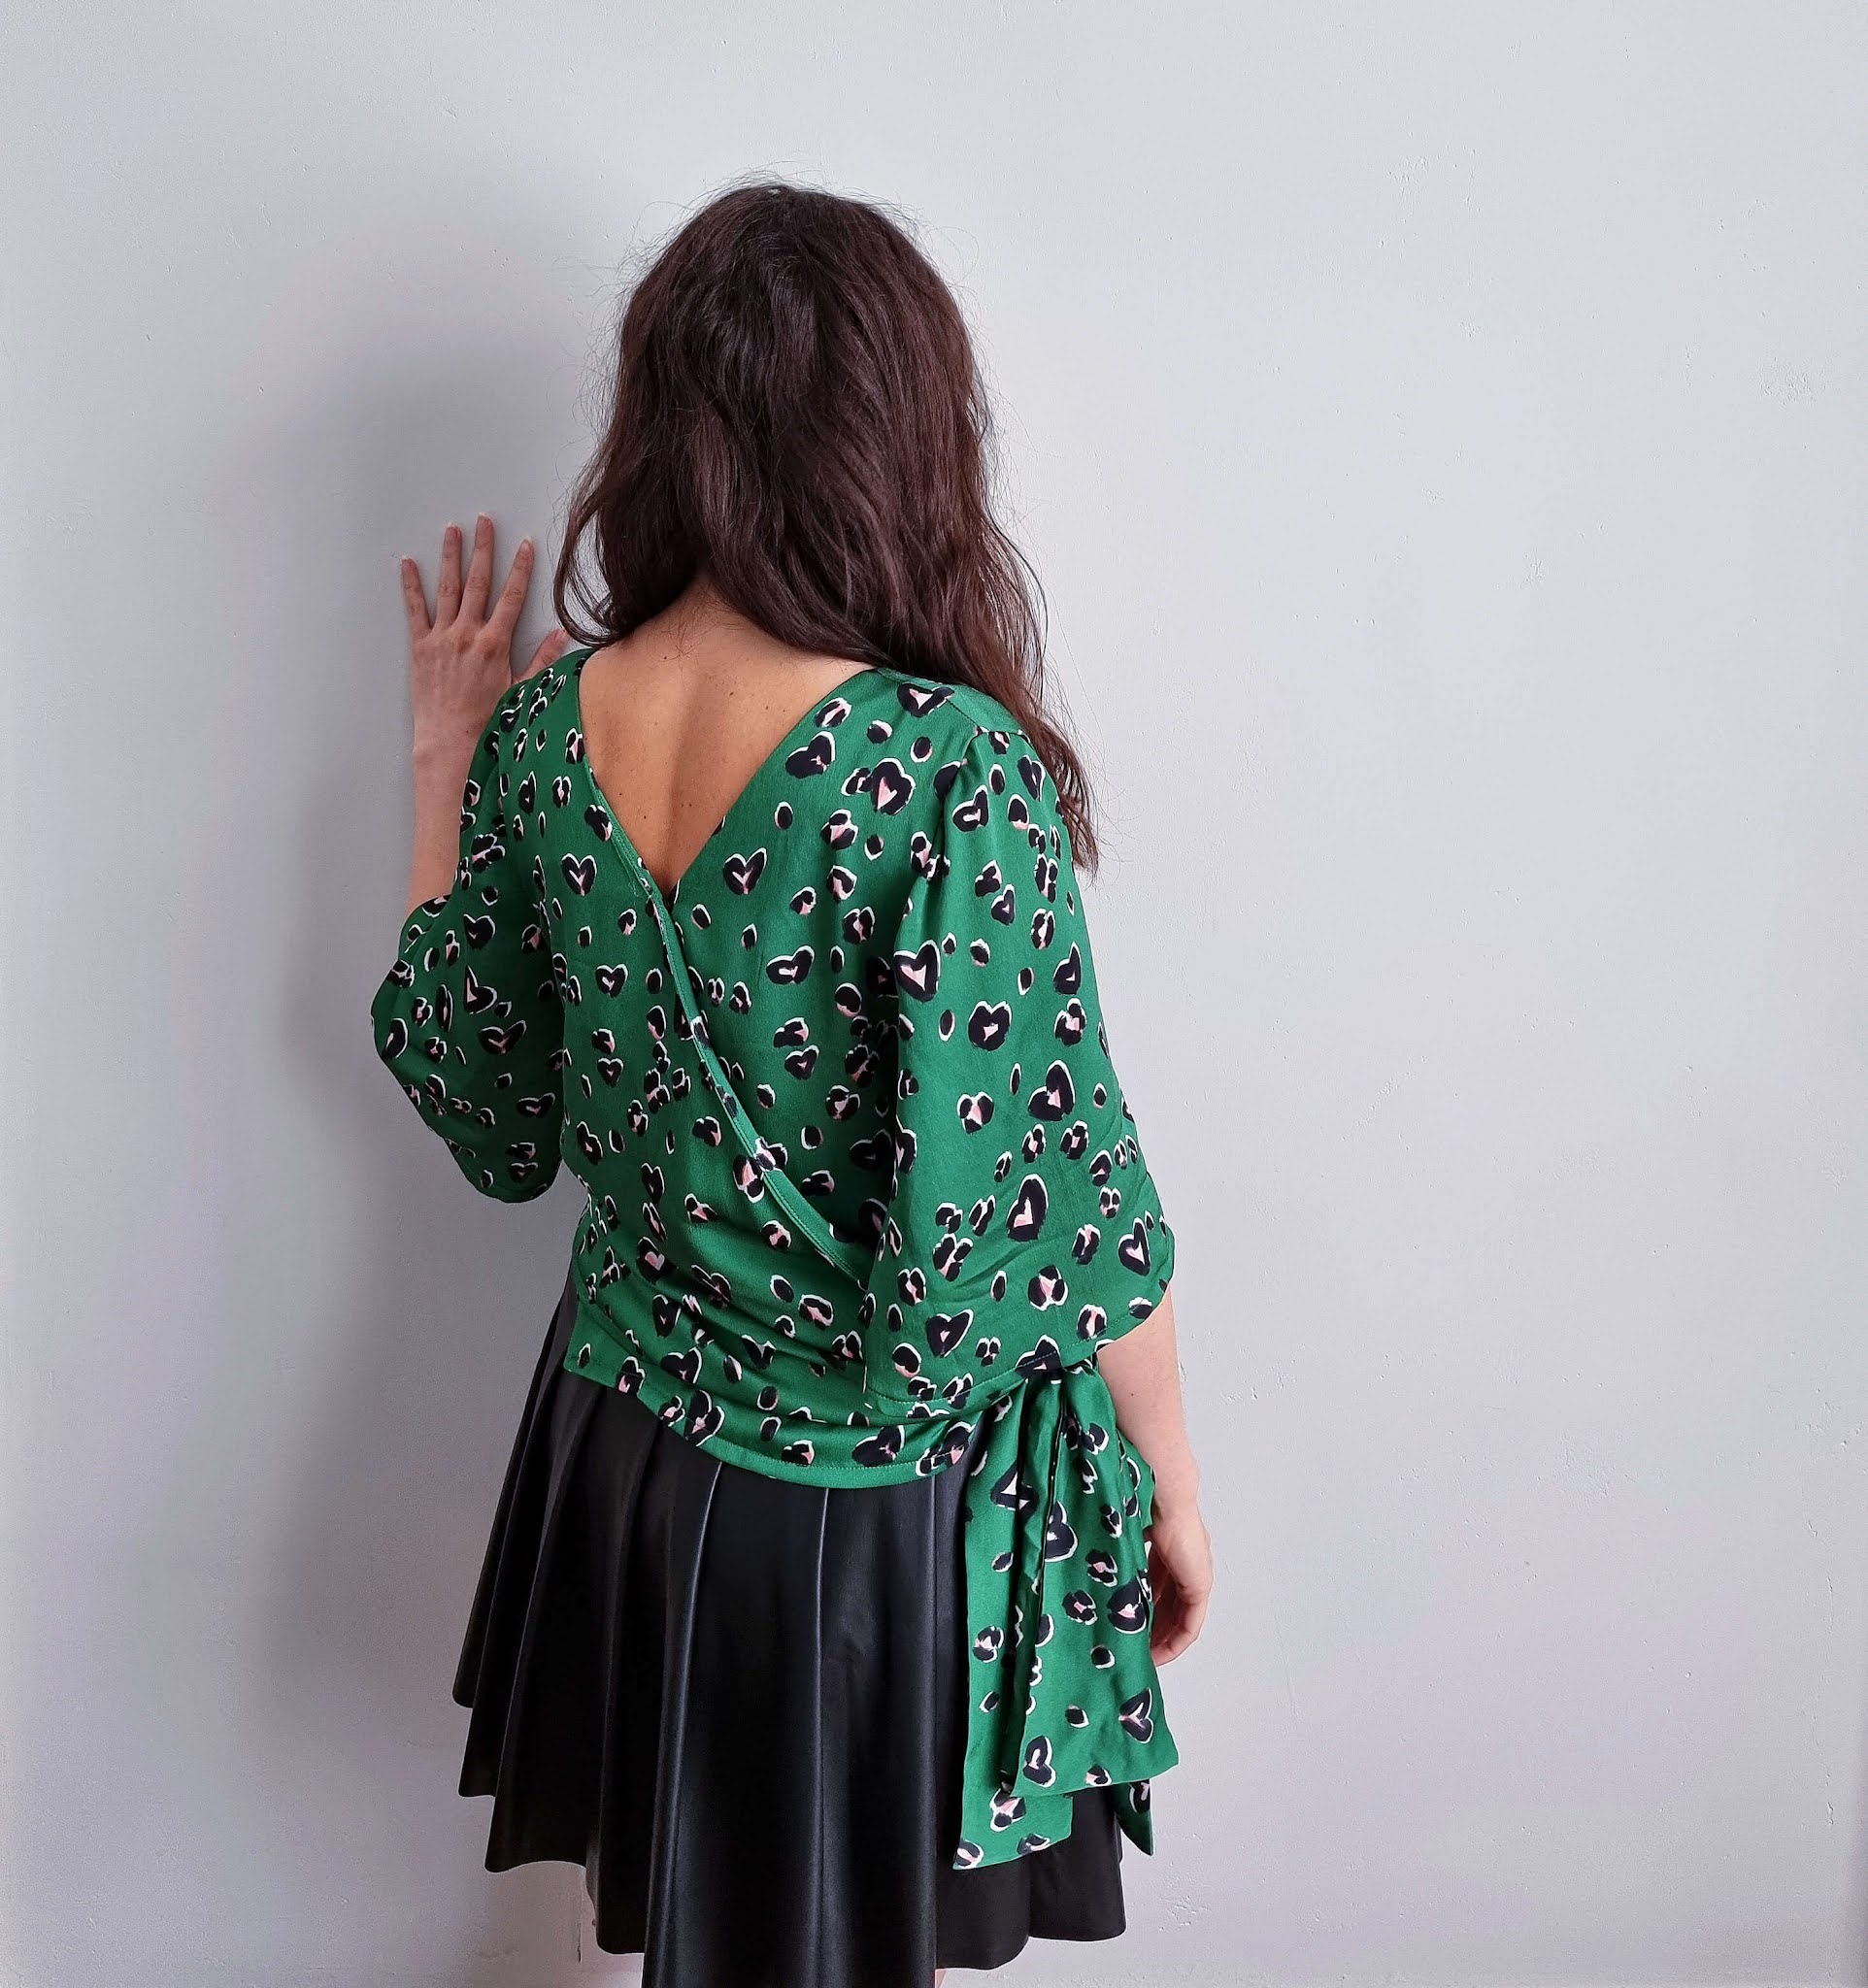
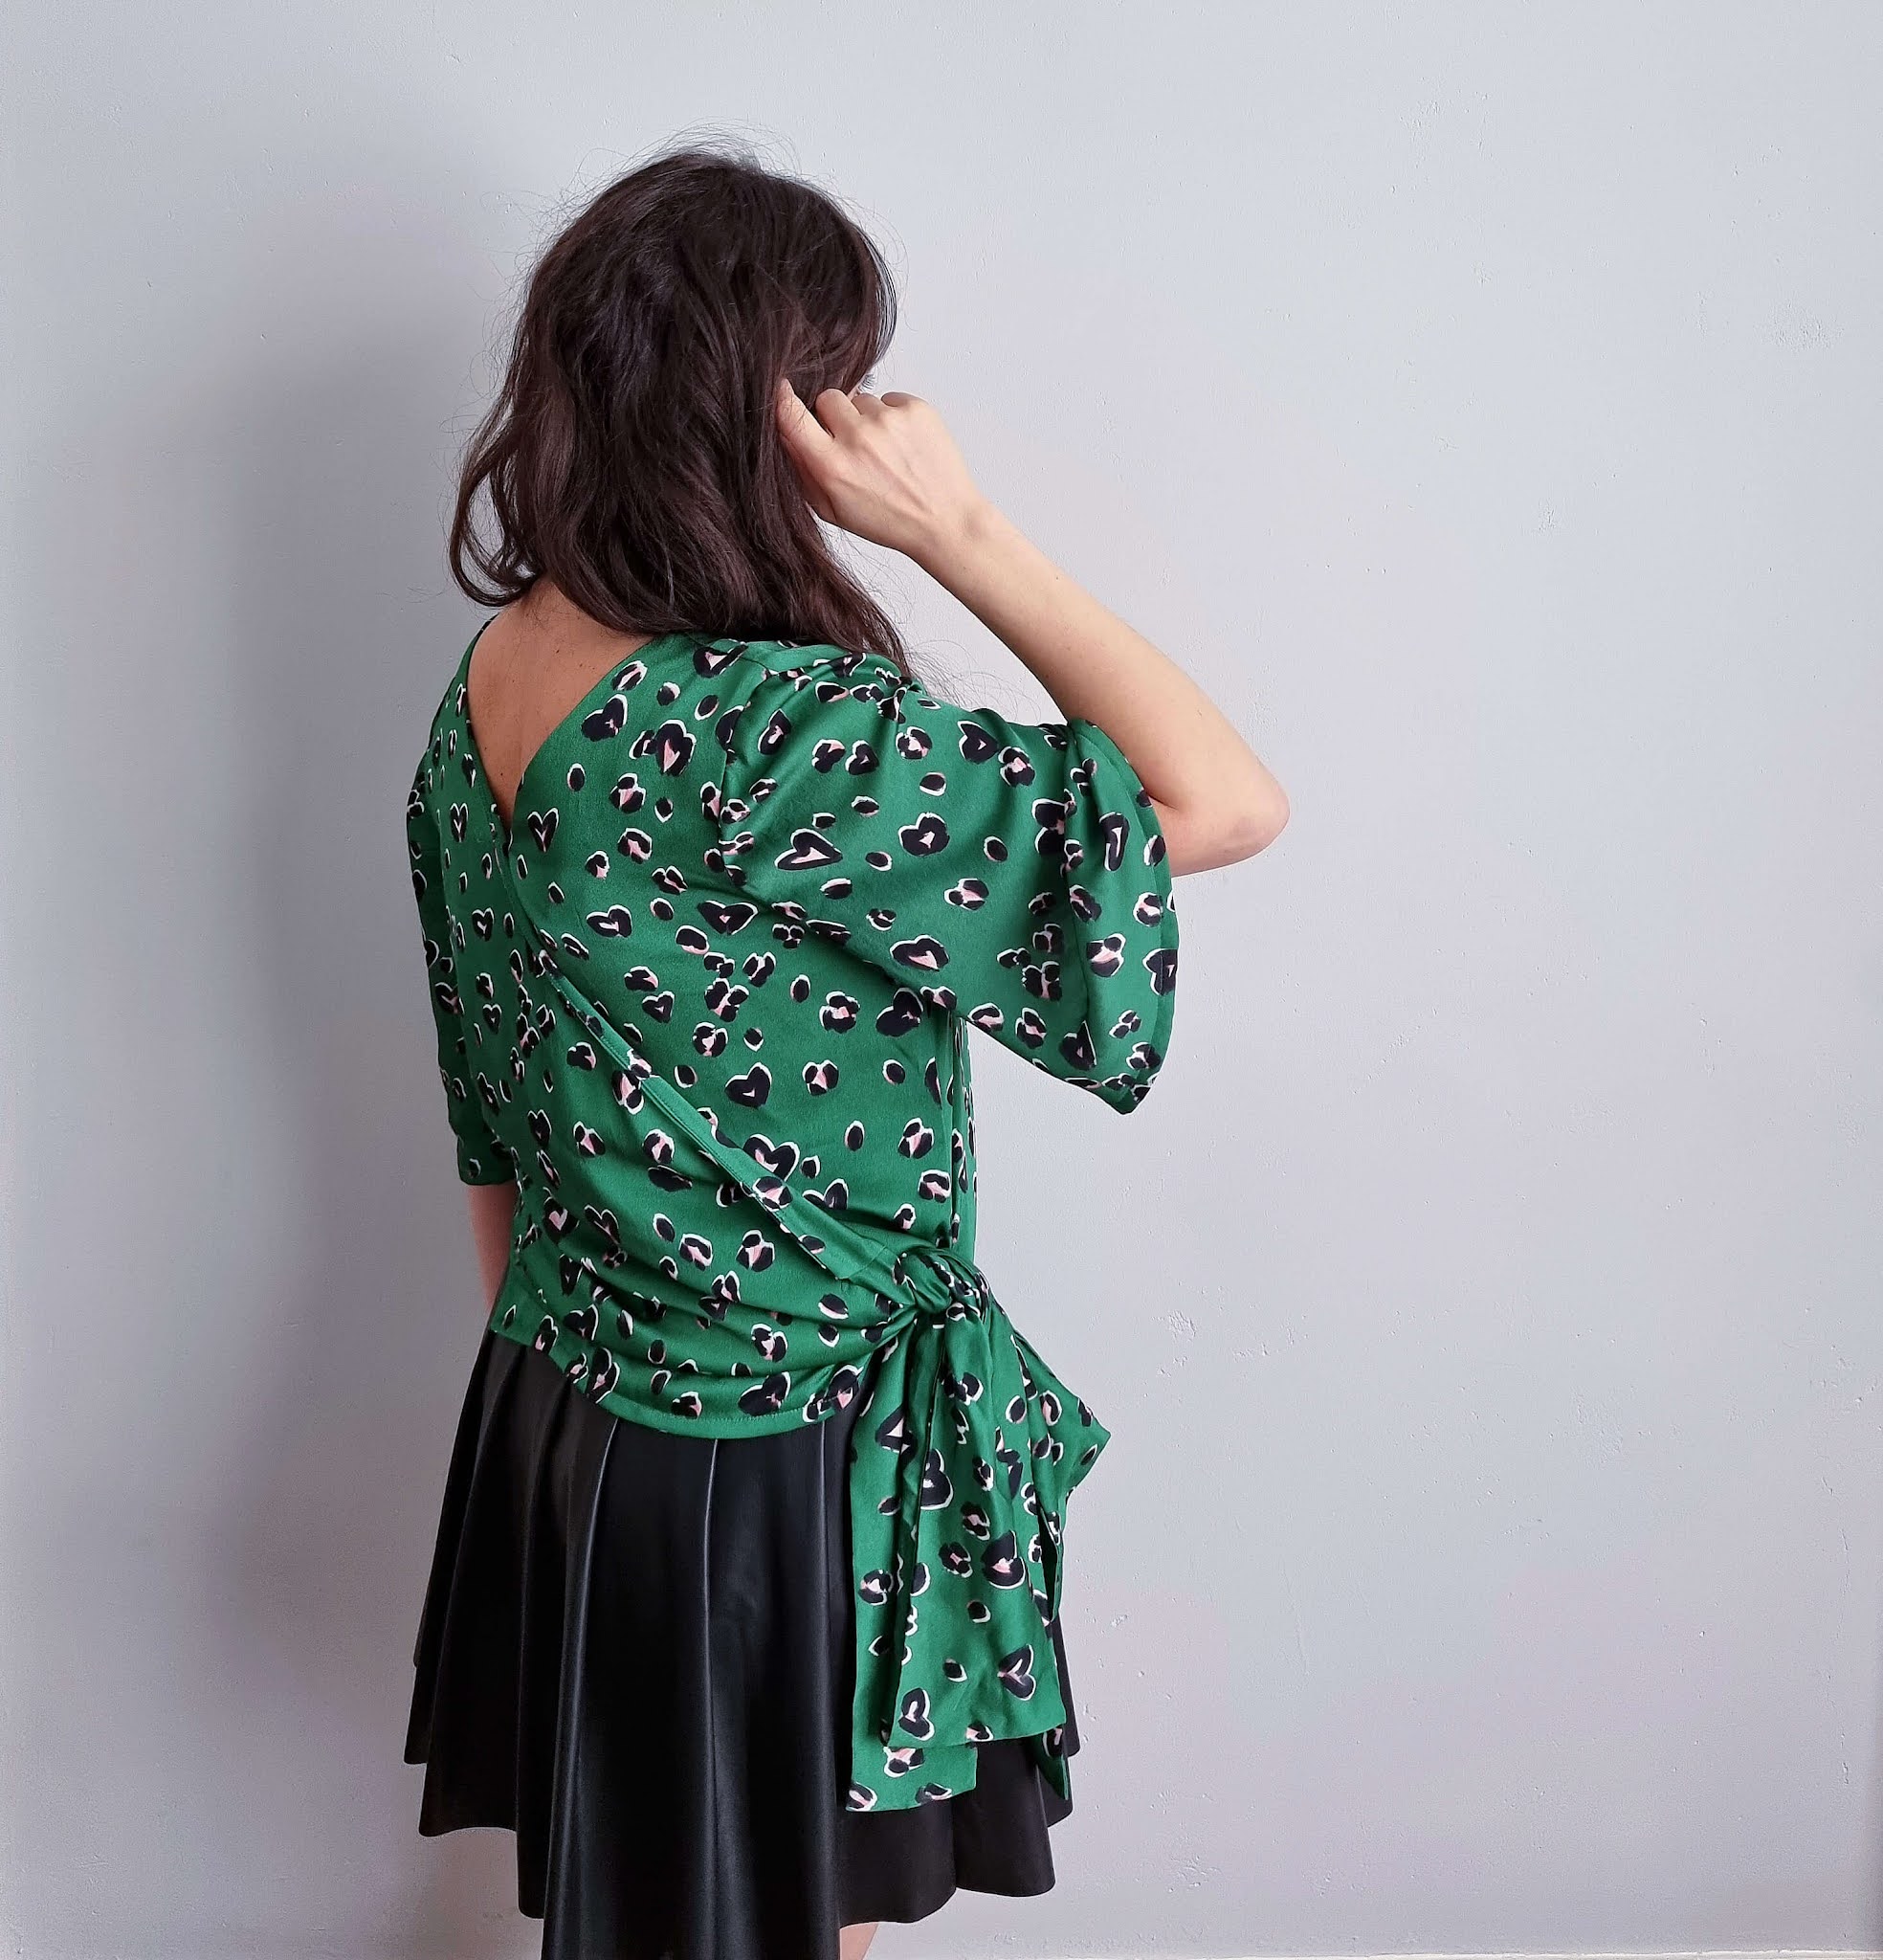
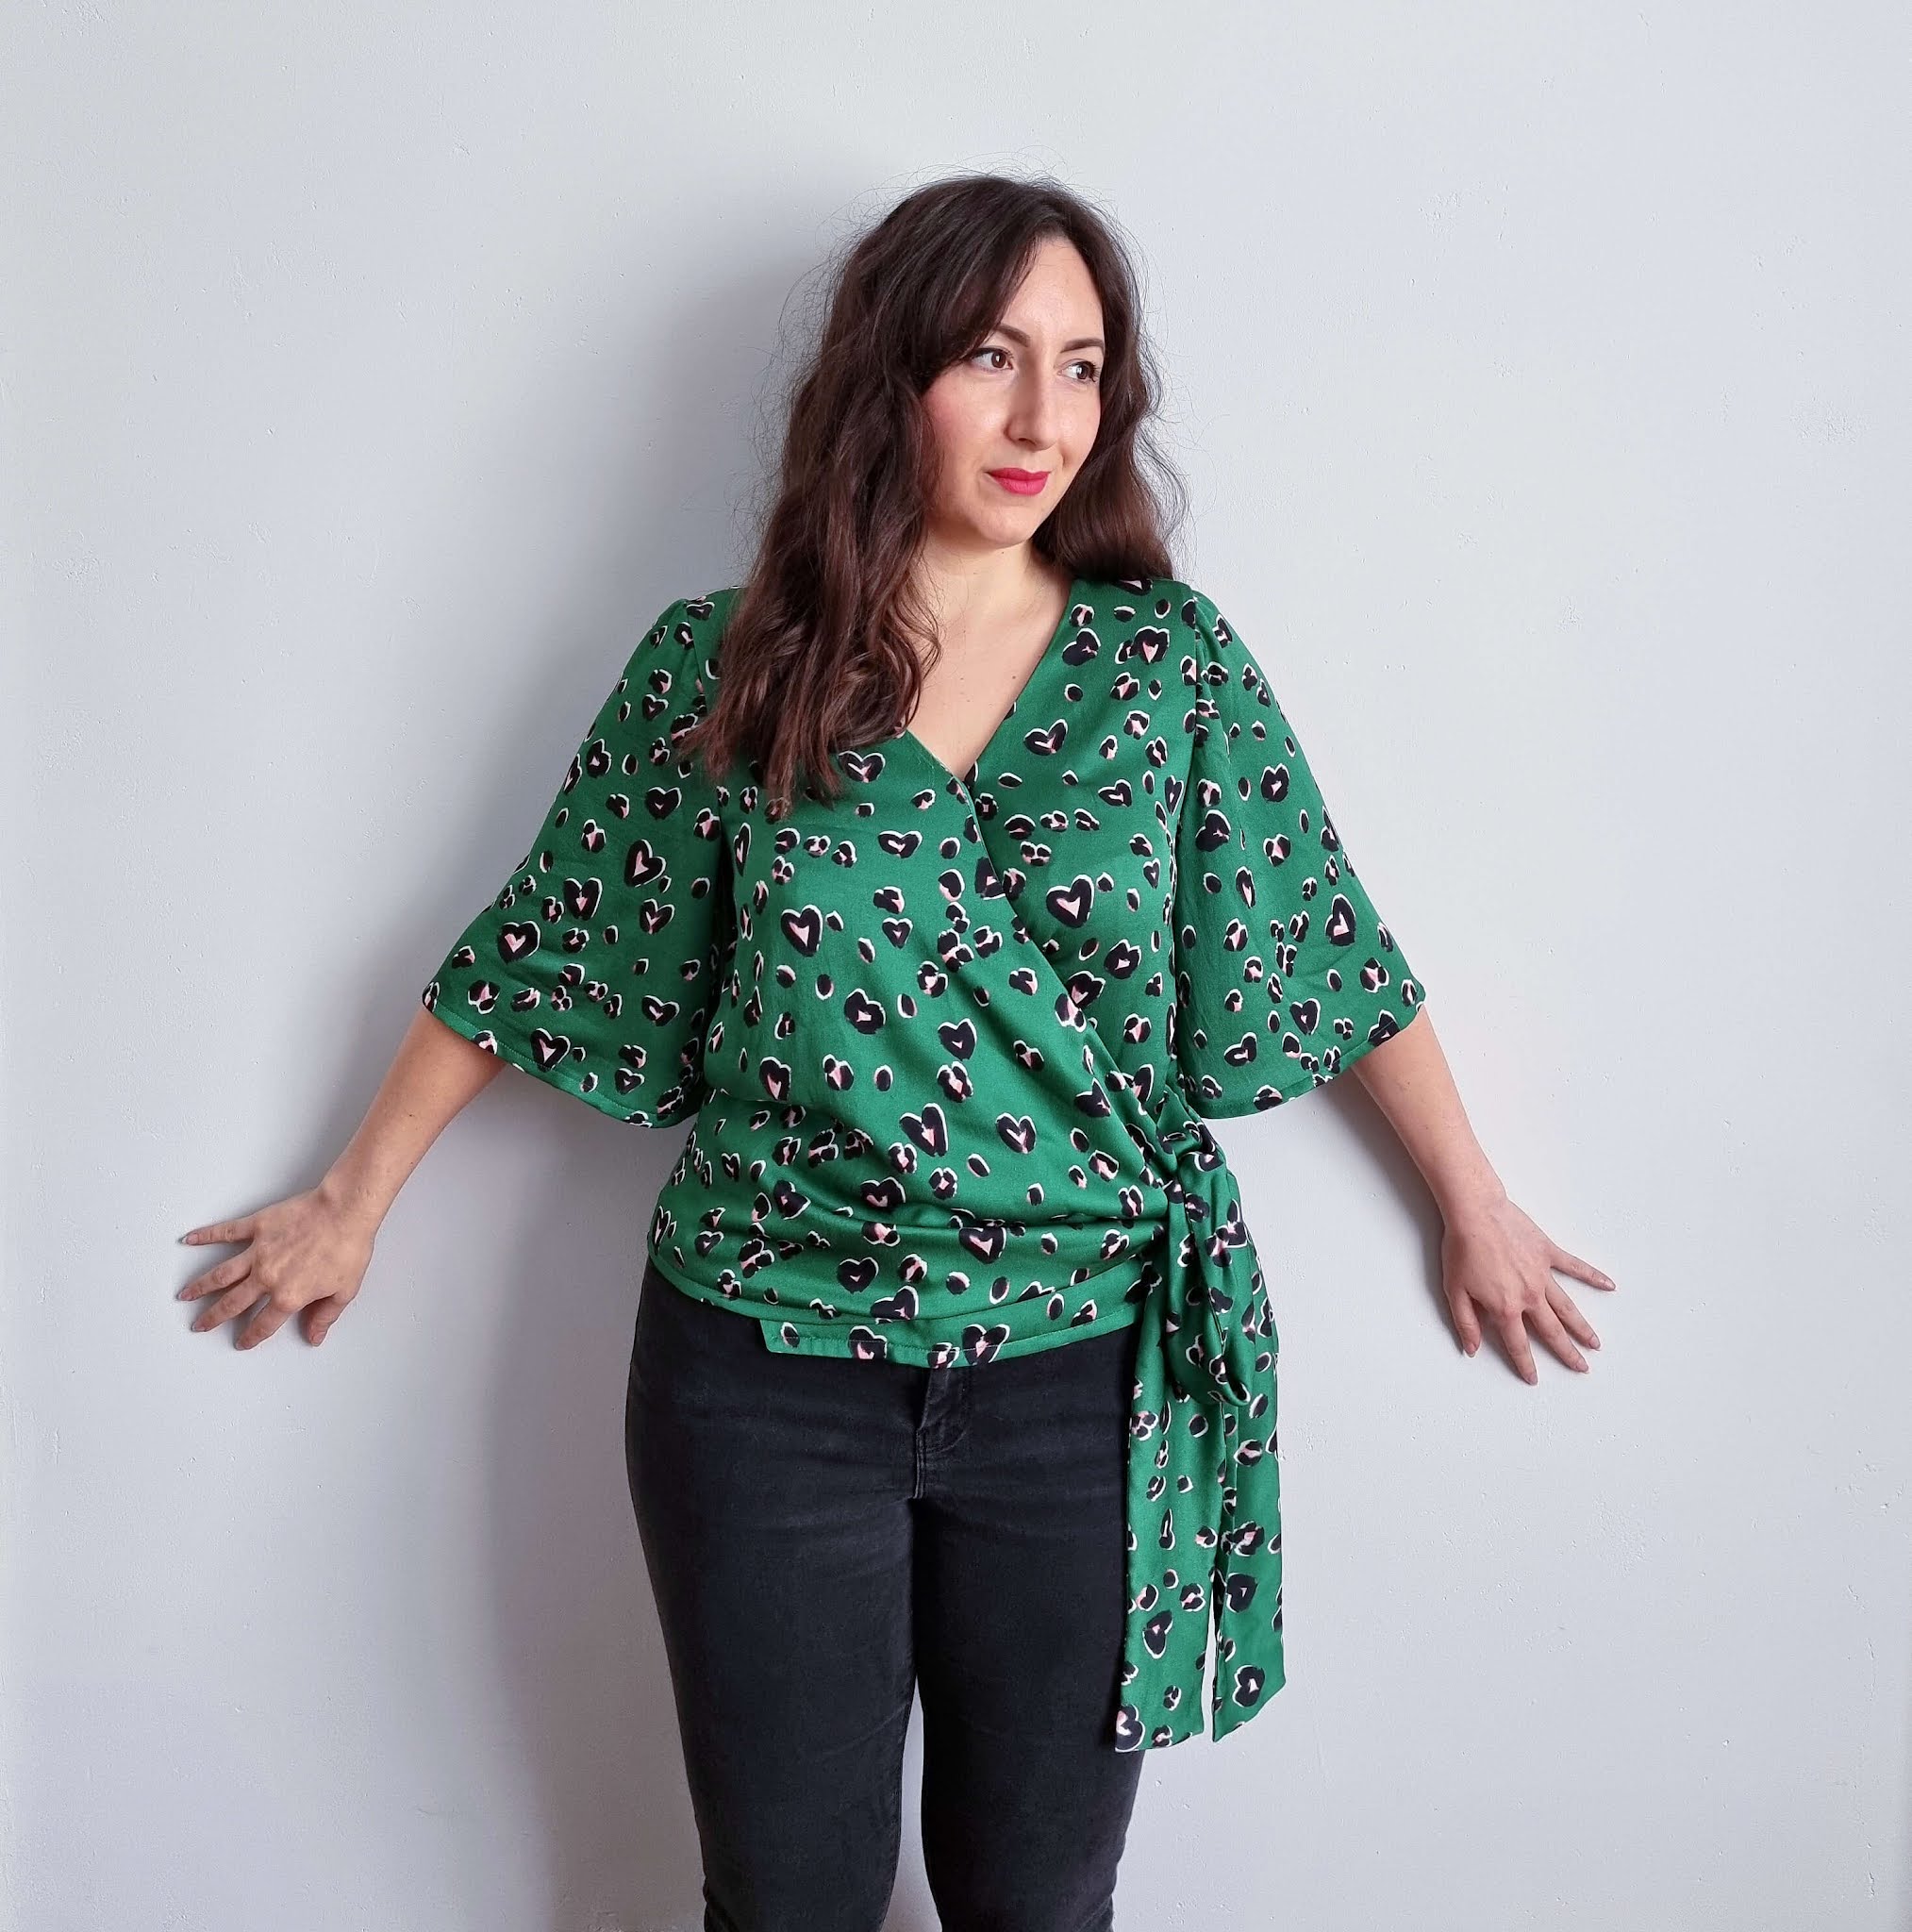
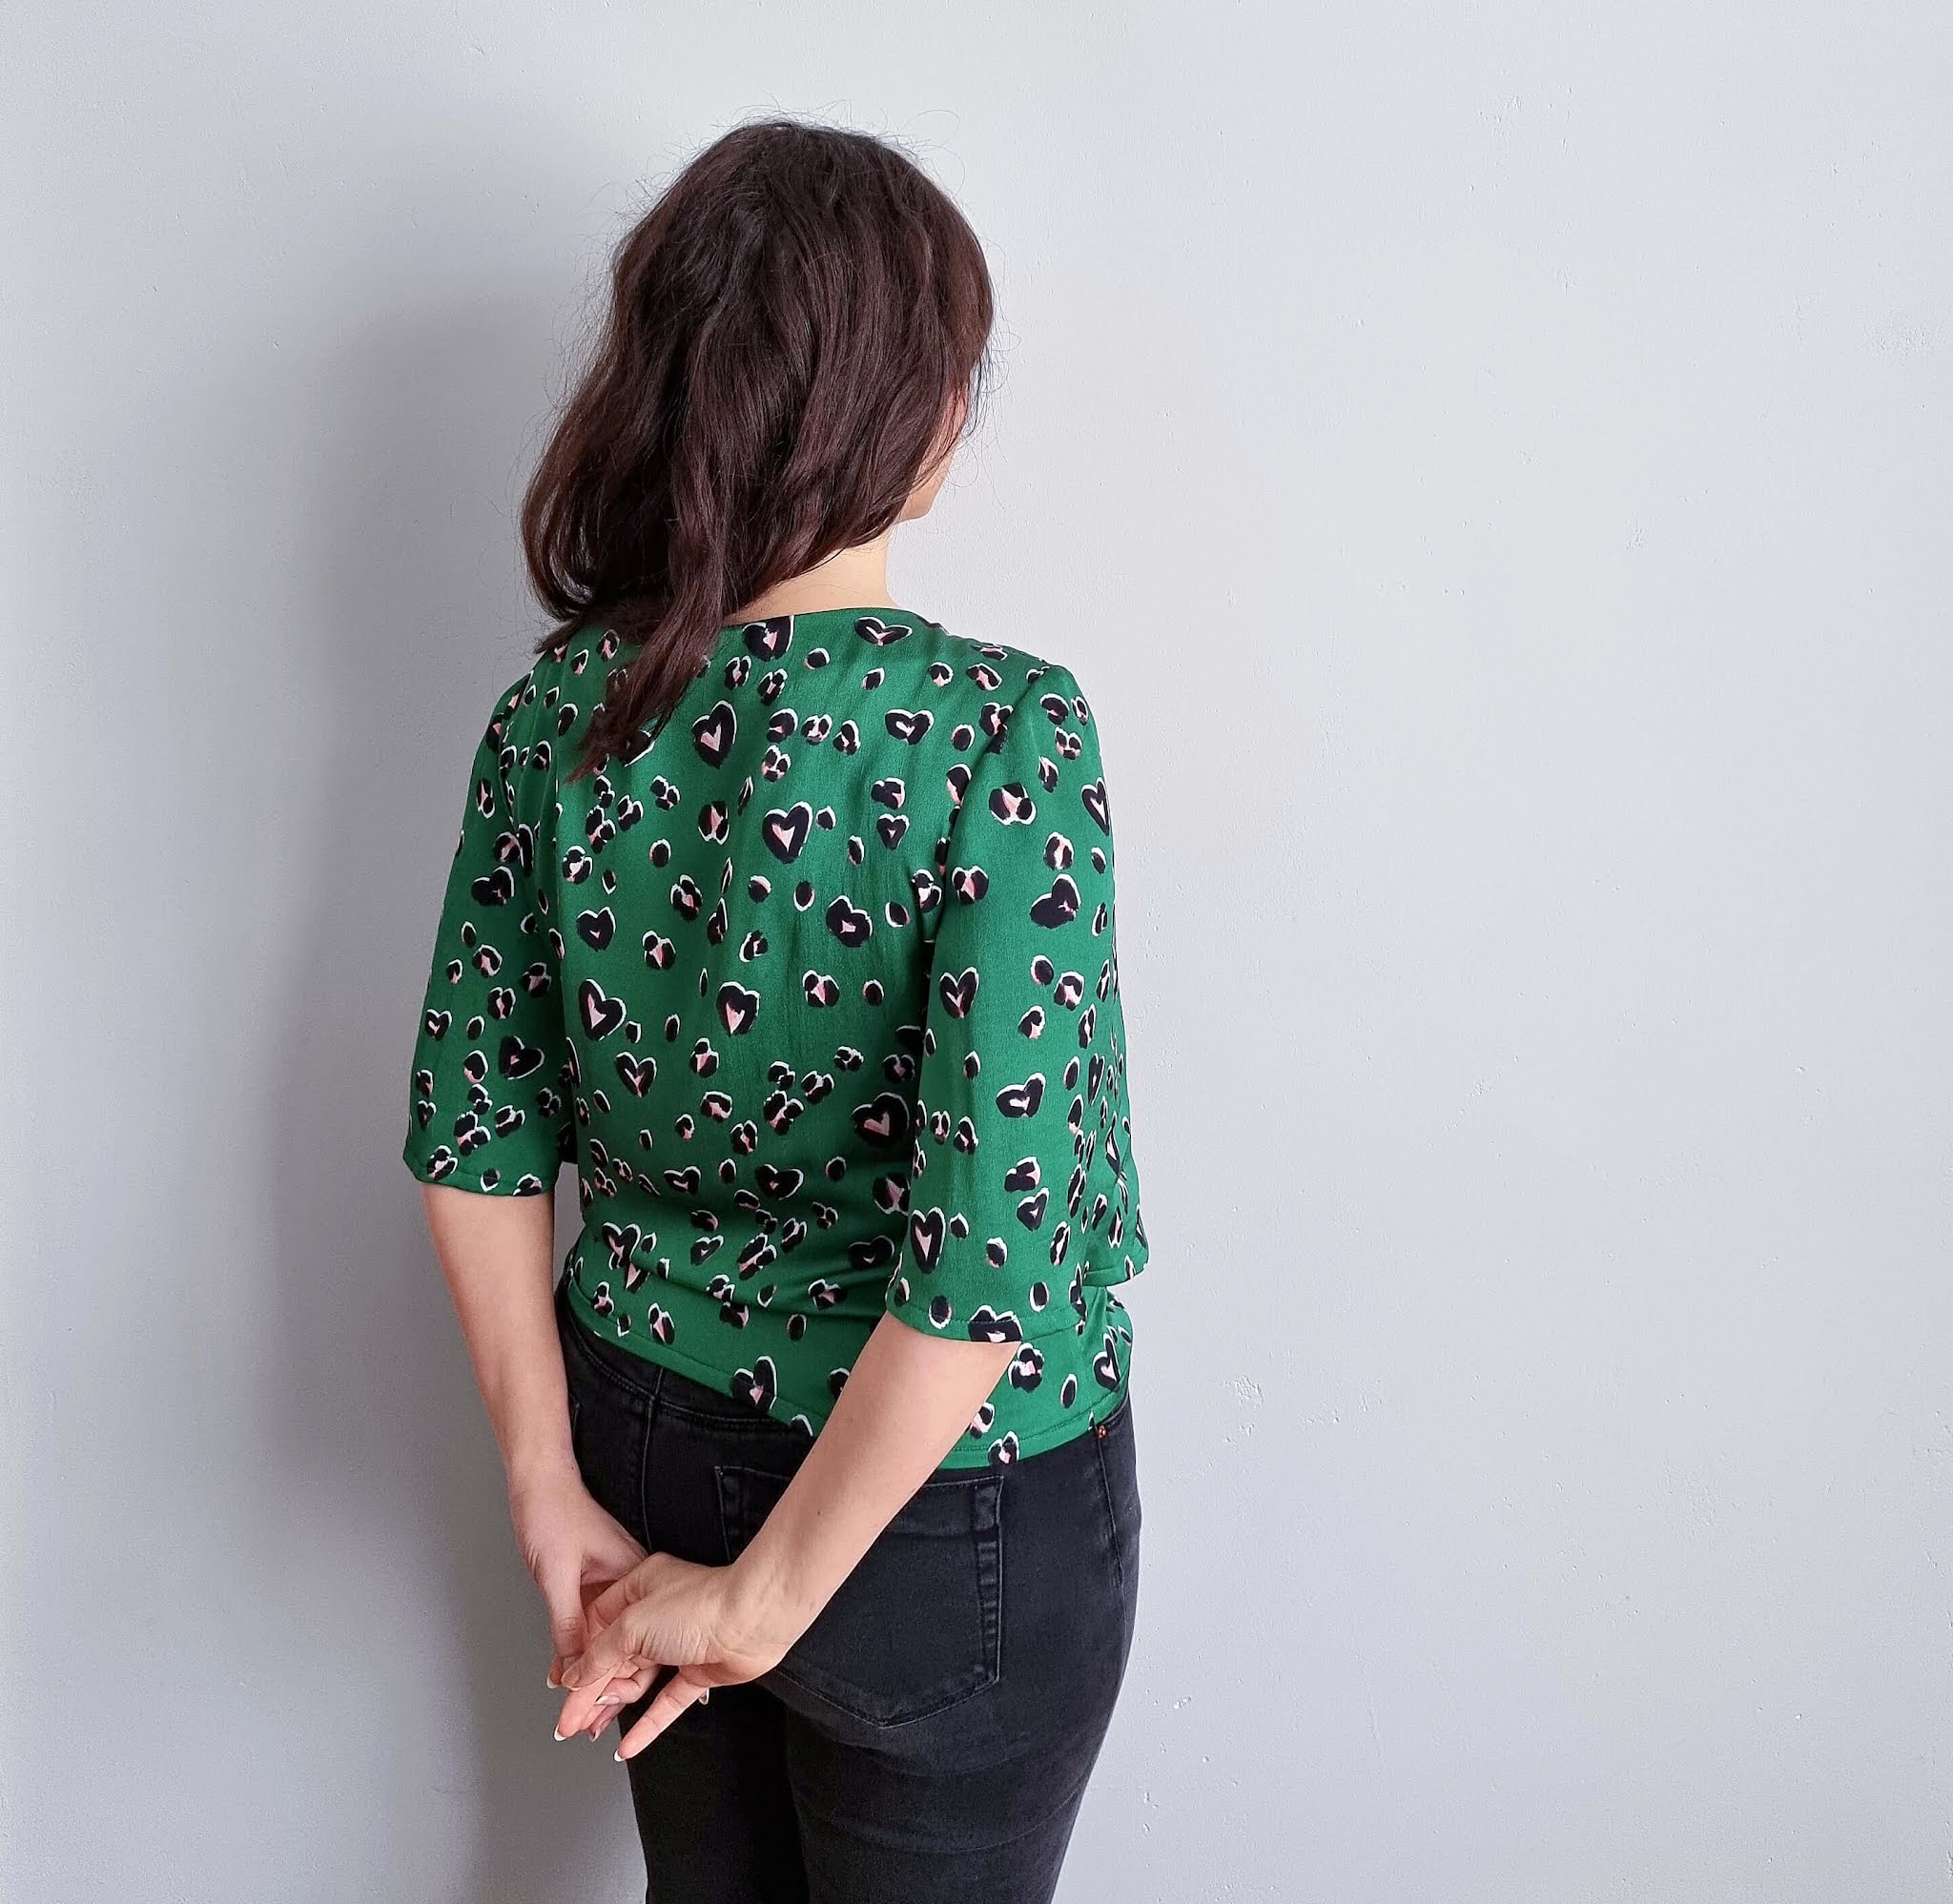
The coolest thing about the Sequence Blouse is that you can tie and wear it in a number of different ways. I actually think I prefer it with the 'V' at the back on me, but it's great to have such a versatile blouse in my handmade wardrobe. 

I've seen people tie it more centrally at the back, with the snap fastening undone for a sexy shoulder reveal, but I can't go braless so I'd have to wear a vest and ruin the look.


It sounds silly reading this back, but the Sequence Blouse really challenges my inexplicable desire for symmetry, so it's a bit out of my comfort zone in that sense. Nevertheless, it's such a pretty design and the fabric is truly sensational.


I took full advantage of the last of the sunny weather recently to photograph my Sway Dress, a Papercut Patterns design which doesn't seem to be readily available anymore. If you know why that may be, please do spill the tea.


Despite a major wobble halfway through construction, during which I convinced myself that I was making a frumpy nightie, this dress turned out to be a surprise summer hit. Once I added the waist tie, the silhouette was completely transformed, giving me some rather charming vintage vibes. 

I made it in this stunning viscose sateen from Fabric Godmother's own collection and I'm seriously considering buying the green colourway too. It's a slippery little sucker to work with, but a dream to wear. To make sewing with this fabric as smooth as possible, I used a microtex needle and slightly lowered the tension on my presser foot. 


The cool thing about this dress, other than having pockets of course, is that your can wear it back-to-front with either a V or rounded neckline. I've been wearing it this way round, but should really try switching it up for a different feel. 

I made a straight size small, moving the waist tie loops higher to accommodate my short waist, and I'm really happy with the fit. Next time I think I'll pinch out 1cm from the front and back necklines so they sit as flush as can be. I'm also tempted to raise the armscye by 2-3cm as it sits quite low on me, leaving a fair bit of my bra exposed.

It's a fairly quick and easy sew, definitely satisfying to whip up on a whim. Having never cut/sewn on the bias before, I did find levelling the skirt out after letting it hang overnight to be super tedious. If you have any tips for that, I'd love to read about them in the comments!


All in all, I feel really pretty in this dress...and that's not something I say lightly.


Can you believe I made these Tilly and the Buttons
Safiya Trousers in May 2020 and have only just gotten round to sharing them? They're more than a year old now and I made them three whole months before the dungarees version I blogged about here


The pattern is one of six featured in the Make it Simple book and it certainly is quick and easy to sew up. It has an elasticated waist with flat front, which is the perfect combo for a smarter look, as well as pockets and a relaxed culotte-like fit. 

If I remember correctly, I made a straight size 4 and shortened the length by 2-3cm. It's pretty spot on, but one thing I don't love about the design, is that the elasticated part of the waistband starts at the side front. On me, this adds volume to an area of my body which has enough natural volume already, so if I make another pair I'll start the elastic further back.


I endearingly refer to these as my clown pants because the print is pretty out there, even for me. It's a mystery vintage polyester fabric I picked up in Cyprus, with a satin-finish, subtle ribbed texture and a bit of stretch. Surprisingly though, they actually go with loads of things in my wardrobe thanks to their multicoloured nature.


Minor niggles aside, they're comfy, smart and fun...what's not to like really?


The cheese and pineapple hedgehog is done, Pina Coladas are chilling and this is my entry for the #SewSeventies challenge hosted by Georgie and Yvette. If I'm being honest, I think my pattern and fabric combination is a little too on the nose, making it feel a bit costumey. You can't win them all though and it makes a comfy house dress during warmer weather.


To be clear, there's nothing wrong with the pattern, which is the Pattern Fantastique Vali Dress and Top. I just think that paired with this vintage 1970s cotton voile it's a bit much on me. Also, despite being a beautiful design that looks fantastic on everyone else I've seen wearing it, as I suspected, my proportions make it difficult for me to carry off this silhouette.

For reference, I made a size 14, shortened the skirt by an inch and the fit is pretty spot on. The pattern comes together quite quickly, but sewing the yoke and getting neat corners on the sleeves can be quite fiddly. The grown-on pockets make for an interesting and speedy construction, but I think I prefer the finish of the traditional method. As a hopefully helpful aside, despite having child-sized hands, I actually found the pocket opening to be on the snug side.

The written instructions can seem a little overwhelming, even though they include some really useful tips for steps like hemming, so I'm extremely grateful to Sara SJ Kim for sharing this brilliant step-by-step sew-along, which I followed from start to finish. 


You can't tell in these photos thankfully, but my fabric is VERY sheer, so that's another reason I won't be wearing this 'out' out. Instead, I'll happily channel my grandma as I clean the house, but my Vali Dress would also make the prettiest beach cover-up. Looking at this last photo, I wonder if making a belt from my fabric remnants would encourage me to wear it more. What do you think?


I've had this Liberty lawn in my stash for at least eight years and I can't tell you how many times I've rescued it from multiple destash piles at the very last minute. I've never known what to make with it, but something kept me from parting with it and the stars finally aligned.


Inspiration struck when I spotted the beautiful button down blouse below from & Other Stories and realised I could totally make my own using the Nina Lee Bakerloo Blouse. At first I was hellbent on finding a similar green floral fabric, but my search was futile so I reluctantly settled for my Liberty lawn. I don't know why I was so reluctant because I couldn't be happier with the result.


Just like my first Bakerloo Blouse, I made a straight size 12. This time I opted for the shorter sleeves and I shortened the bodice by around 8cm. As much as I love blouses tucked in on others, my proportions make it difficult for me to carry that look off, so I tend to prefer my tops on the shorter side and untucked. I'm tempted to go even more cropped next time. And yes, I could have hacked the pattern to add a button front, but I couldn't be bothered and I love it just as it is.


As I ponder all the potential Bakerloo Blouses in my future, I'm beginning to wonder how many Bakerloo Blouses is too many?


I was recently sent some stunning wax print cottons from House of Yeshua Fabrics to review, so I decided to make haste and join in with Ankara Appreciation Week. Hosted by Lena King and Juliet Uzor on Instagram from 12 to 18 July, the week is an inclusive celebration of the distinctive fabric. Lena shared this introductory post if you want to know more, support Black-owned businesses and find out how you can take part.


Of the prints Patience sent me, this one is the most striking and unusual, so I was itching to sew it up. I didn't have much to play with and a simple skirt was my best chance to make the most of the print and cool gradient. 

I opted for the Nina Lee Kew Skirt variation in a size 10, with an added ruffle for a little extra something. I took 20cm off the length and evened out the hem to eliminate the pattern's high-low detail. For the ruffle piece, I doubled the width of the hem with a 12cm depth. Once I attached the ruffle to the skirt, I measured the length and amended the facing pattern piece to fit before cutting it out.

It's a bit sad I didn't have enough fabric to pattern match, but I think the end result is still pretty cute. I'm particularly fond of my alternating pink and yellow buttons, both perfect and from my stash.


The skirt pattern came together really easily and the fabric was a delight to work with. This is my first time sewing with wax print cotton, so I don't have anything to compare the quality to, but I'm really happy with what House of Yeshua Fabrics sent me. The designs and colours are stunning and the fabric softened beautifully after a wash, maintaining all of its vibrancy.


There's something undeniably joyful about wearing this skirt, which I've got to put down to the fabric. Happy Ankara Appreciation Week everyone - hope this week is inspiring for one and all!  


Four months no post, but I'm back with my fifth Deer and Doe Myosotis Dress and she's delicious! I was inspired by this dress the gorgeous Samantha (@purplesewingcloud on Instagram) made using a fun apple-print cotton byGraziela Fabrics. We even filmed a little reel to celebrate our twinning...you're welcome!


There's not much to say about the making of this dress that I haven't already covered before, but here's a brief rundown if you're interested:
  • Sized down to a 38 for a closer fit
  • Added 80cm waist ties (fun fact: I made them using the pretty selvedge)
  • Omitted the standing collar (I have a tutorial for that)
  • Kept the original skirt length with a ruffle
  • Opted plain sleeves


It's safe to say that the Myosotis Dress is one of my favourite patterns out there. Such a true 'tried and tested' that I have to consciously try to give other patterns in my stash a fair chance. This version in particular is very joyful, thanks to the print and colour combo.


What are you thoughts on Myosotis?