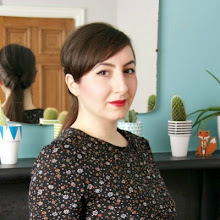
Kick-starting the last month of Watch This Lace for us, I've got the lovely Handmade Jane! This lady hardly needs an introduction and I think we can all agree that one of the most distinctive things about Jane, is her very strong sense of style. For me, Jane proves that less really is more - she knows what she likes and sticks to what suits her. As a result she has an enviable handmade wardrobe, filled with chic individual pieces that also work beautifully together. You can see why I wanted Jane to take part in this...

When Marie asked me to take part in Watch this Lace I was thrilled and flattered, but also a tiny bit worried! Apart from trimming a hem, I've never used lace in my sewing before, so I needed to think long and hard about how to use it. I wanted the finished garment to fit in with the rest of my wardrobe and be something I'd wear, but as I'm not a particular lover of frills and flounces, I knew my version was always going to be on the reserved side. I finally decided to use the lace as a border/edging on a collar and front edges, using the Sewaholic Alma blouse pattern.


My other consideration was that I wanted to use fabric from my stash for this make. After pulling out all my dressmaking fabrics and holding the beautiful, cream lace against them, nothing seemed to get me going. Purely by accident, a chambray coloured shirting happened to be on the bed at the same time, and when I held the lace against it they were a perfect match. Hoorah!


I only just managed to cut the blouse out from the metre of fabric I had to work with though. If I'd had more fabric, I'd have made a button up version (anything to avoid a side zip) but given my scant allowance, I had to be creative. So I added a fake placket, which still gives the appearance of a button up blouse but is much simpler to sew. I carefully pinned my lace up each side of the placket, having first decided what level of lace was allowed to peep out. I then just top stitched down each lace trimmed placket edge. Easy peasy! Attaching the lace to the collar edge was a little more involved, but still pretty straight forward. As a final touch, I sewed small, flower-shaped vintage buttons down the front.


With my last Alma blouse, I cut a size 10 in the bust, 8 at the waist and 4 at the hips. This time round, I cut a straight size 10. I had to take in the shoulder seams quite a bit and the hips a smidgen, but joy of joys, it goes over my head WITHOUT A SIDE ZIP!!! And because of the contour darts it's still nice and fitted. I now have a top that will blend seamlessly into my current wardrobe for a total cost of £3.50, which was the cost of the fabric. The lace was very generously donated by Marie, and the vintage buttons were from my stash.


I've really enjoyed seeing the very different spin each sewing blogger gives to their own individual project. Taking part in this challenge really did make me think more creatively than usual. I had a picture in my head of what I wanted, but I had to fiddle around with a few techniques and ideas before I achieved it. I do tend to get a bit lazy with my sewing sometimes, so this was a perfect project to jump start the New Year. Thank you so much for inviting me to take part Marie, it's been an absolute pleasure. X

I'm so impressed at how Jane cleverly managed to incorporate the lace, without compromising her very clear sense of style! And don't get me started on the styling...the mustard tights are such a cool touch. Many thanks for playing along Jane! 

Next week, we're finally venturing across the pond to see what the super cute Sonja from Ginger Makes has in store for us!
You've seen the gorgeous Mathilde Blouse sewing pattern released by Tilly and the Buttons yesterday, right? Well, don't be too jealous, but I was one of the lucky pattern testers!!! I was so shocked when Tilly asked me, but I was determined to nail this sweet little number and I'm really pleased with the result. 


The pattern itself was lovely to work with and came together fairly quickly and easily - thanks to the most comprehensive instructions I have ever had the pleasure of following. Tilly has outdone herself regarding the quality and the detail of her instructions which actually felt more like a sewalong - in fact I think she's planning on using them as a bit of a sewalong here. Unusually for me, I didn't have to make any adjustments to get a great fit! I just cut a size 3 for the main bodice and a size 2 for the shoulders, neckline, armholes and sleeves.

Mathilde has a number of dreamy details that are hard to resist - back buttons, front yoke, frothy sleeves and tasty tucks. On the tasty tuck front, there are two rows of three tucks on the front bodice and I would seriously recommend practising on a muslin first if they're a first for you. Don't worry, they're not hard, just a bit fiddly...especially when using slippery fabric. Tilly offers some great advice for handling the tucks with slippery fabric, but I would also add that I pressed, pinned and sewed each tuck individually. This took a bit of time, but worked out really well.

I squeezed the blouse out of some fine, 1960s cotton voile that I bought in Cyprus. It's really sheer and  I didn't want to ruin the look of the blouse by wearing a cami/vest underneath, so I underlined the bodice with cotton lawn. Although this compromised a bit of the voile's drape, the result is still lovely...so I think I got away with it. I left the sleeves unlined and I'm fond of how delicate they look.

Just proving that my tucks do really exist!
Normally, white's really not my 'thing', but I'm pleasantly surprised by how this turned out. I've already worn it a couple of times and it's received plenty of compliments, which is always nice. For me, this pattern's a winner and I'd like to make another version with shorter sleeves too. Thank you Tilly for inviting me to be a part of your exciting process!


What do you think to the Mathilde Blouse sewing pattern?

If you need further convincing of its brilliance, check out Tilly's Maker Gallery for more delicious versions...
Some of you have probably noticed that I’ve been tinkering with the design of my blog for a few months now. Ideally, I would have ‘unveiled’ it all at once, but full-time work and many other commitments meant I could only tinker in short bursts.

Last night I added a couple more features that I’ll outline below, but it did strike me that the new look is actually very different to how my blog started out. Annoyingly, I never thought to take a ‘before’ screenshot, but luckily I stumbled across one (albeit very low-res) over at Ohhh Lulu’s.

BEFORE


 AFTER


I hope you agree that there’s quite a dramatic yet positive difference. I’m particularly in love with my ‘new’ header, which is actually made up of photos from vintage sewing patterns in my collection – I definitely need to get around to sewing up each one!

I’m also hoping that the additional pages will make my blog easier to navigate. Sewn Makes, Knitted Makes and Handy Bits have existed for a while and seem to attract a lot of visitors. I’ve also just added:

About – contains my ‘story’ and contact details.

Sponsor – I’ve finally taken the plunge in offering affordable sponsorship for crafty businesses and individuals looking to raise their profile. You can see how this works / looks from the static adverts already featuring on my right hand sidebar. But I promise that I will vet these carefully so they remain in line with your interests and so that they don’t compromise the integrity of this blog.

The eagle-eyed among you will also notice that I decided to change my blog name - I felt like A Sewing Odyssey was too one-dimensional considering I now dabble in knitting too...so A Stitching Odyssey was born. I'll be getting a shiny new url to reflect this soon, but don't worry, when the time comes you should just be redirected to it automatically.

Anyway, I still have more plans for improvement – including an I Like page featuring my favourite stitching related stuff – but there are only so many hours in a day! I’ll get to it eventually though...

Feedback and thoughts on the ‘new’ design are more than welcome. Ultimately, I hope that you like it and that you find it easy to navigate!
Friends, we're halfway through Watch This Lace already, can you believe it!?! Firstly, a quick confession: I'm pretty sure I want to be today's participant! Anna from paunnet is a cool Italian (so much cooler than being Cypriot), she fully utilises the stunning Italian countryside in her equally stunning photos, she has gorgeous mermaid hair and I would quite literally swap wardrobes with her in a heartbeat. In fact, I'm having to try very hard to keep the green-eyed monster at a bay after today's offering...

Hello, everyone! I'm very happy to be a guest of the lovely Marie today! When she contacted me asking if I wanted some vintage lace to make anything I wanted, I was so excited! I'm all about girly and feminine clothes, so lace fits perfectly in my aesthetics.

I'm so used to being inspired either by a pattern or fabric, however, I had a hard time figuring out what I wanted to make using this lace as a starting point. It was a change in my creative process and I actually enjoyed the challenge. My first idea was actually a dress with a bodice VERY similar to Winnie's gorgeous Librarian blouse. For the sake of variety in this blog series, luckily I changed my mind and started thinking about a lace collar. If you are a reader of my blog, you might know I am slightly obsessed with collars. But since a lace collar might be too twee even for me, I decided to go with a half fake collar, made with two lines of lace.


When the idea was clear in my head, I went looking for patterns and I used the bodice of the Burdastyle Sewing Handbook Dress, which I altered by eliminating the front keyhole and making a small one at the back, doing an FBA and adding 1.5cm to the length. And since I wanted a gathered skirt, I went with one from my most trusted patterns, Deer and Doe's Sureau dress.


Finally, I totally lucked out with fabric, when I found this silk blend with a bird and floral print on sale. It was just perfect in terms of colour, print and weight. The dress came together very quickly and as a final touch, I added some lace to the bottom of the skirt.


I'm extremely happy with the final result, it's something I see myself wearing a lot as soon as the temperatures will go up a bit. About that...I apologise if I look a bit rigid in these photos, but it was just about to snow (we now have almost a meter of it) and I was freezing!


I don't know about you, but I'm head over heels with Anna's dress - I think it would slot into my wardrobe just perfectly *hint*!

Next Sunday, I'm excited to be featuring another much loved sewing blogger - Handmade Jane! To see who's already taken part and who else is coming up, hop on over here.
Karen has all the best ideas! Unless you've been hibernating, which would be totally understandable considering the current icy weather, you'll know about her latest clever idea to help us all achieve our sewing resolutions this year.

The 2013 Sewlutions Jar - image cheekily borrowed from Karen's blog!


Often one to back out of a scary challenge, I forced myself to get on board this time...but I decided it would be wise to keep it simple. Alongside 186 other promises, this is what I threw into Karen's jar: 

"I'll be happy if I make one dress this year that is gorgeous and that fits like a glove. I want it to be 'frosting', but frosting that I'll wear more than once."

Why am I telling you this? Because when Karen picks a random sewlution to check up on during the year, I so don't want to be the face of shame! I want to nail my sewlution earlier rather than later, so I don't end up rushing it.

I flagged up this pairing back in September 2012 and I still can't get it out of my head. I think it fits my criteria perfectly - Butterick 2315 is beautiful, yet wearable and the 1950s wool crepe will give it that frosting quality that I'm after.


Wish me luck!

Have you thrown something into the 2013 Sewlutions Jar and how do you fancy your chances of success?

As an aside, you must read Karen's breakdown of the jar's contents - it's really fascinating!
We all have blog/blogger crushes right? Well, I have several, and one of them is Karen from Did you make that? Unsurprising and predictable I guess, but this woman's talent, witty writing and knack for engaging with the online sewing community really set her apart. I was so excited when Karen invited me to take part in her bound button workshop last August and relieved that I had a special way of paying her back...with some beautiful vintage lace. Luckily for all of us, Karen accepted my Watch This Lace challenge and she came up trumps!

When Marie offered to give me a generous amount of vintage lace, I was thrilled! Much as I love Walthamstow market, any scratchy lace bought there would melt as soon as look at an iron.

All I had to do in return was choose something to make and blog about it here.

I chose Simplicity 5599, a 1982 pattern that had been languishing in my drawer for far too long. If you read my blog at Didyoumakethat, you'll know I made a test make a few weeks ago, blogged about here. Many readers were alarmed that I'd even attempted an 80s pattern, but we agreed it was a success. Time to tweak the make and forge ahead with my lace. (My tweaks were to reduce the width and length of the sleeves, and to shave a smidgen off the shoulder width.)

I chose to use an incredibly fine silk/cotton lawn that had been kindly gifted to me. It was pretty and delicate – perfect to combine with lace. But it quickly became clear that the fabric was way too sheer to use on its own. For the main shell, I'd need to underline. Fortunately I had some cheap cream satin in my stash that would do the job. Oh, slippery satin, how I shake my fist at you!


The underlining wasn't straightforward. I couldn't just baste two layers together, because of the front panels and neckline of the blouse, plus lace insertion. So there was a certain amount of back and forth, sewing of seams, trimming, understitching, flipping pieces over, basting, and some delicate hand stitching on the underlined shoulder seams. A sense of doom settled over me at this stage in the make, but I also had a deadline to meet! Nothing for it but to forge on...

Finally, I got there. Most stages were delicate; the fabric was so fragile. And, of course, there were lace details to add. I inserted lace panels down the centre of the sleeves, and stitched a strip of lace to each of my cuffs. Along with the lace running down the front of the blouse, this felt like enough.

Because I needed to concentrate at almost every step of the make, I found the best tactic was to work in short bursts of time. The moment I felt my patience crumbling I stepped away. Then, one final push before work with a coffee by my side, and the last button was sewn in place!

Despite my doubts during construction, I really like this blouse! I don't feel like an 80s throwback at all. Actually, I feel rather like an Edwardian lady in an EM Forster novel. Maybe a young woman working in publishing (How very daring! She works for a living, you know!) and living in London flats in, ooh, let's say St John's Wood. Perhaps I'm considering which poetry collection* my small publishing house should commission next.


Ah, if only my real-life job in publishing was as glamorous as it sounds. Maybe it was, once upon a time...

Thanks, Marie, for this opportunity to fantasise!

* The poetry I'm actually reading? It's Hard To Be Hip Over Thirty. How appropriate!

I hope Karen's blouse has given you all goosebumps like it has me...how dreamy are the lace insets down the sleeves? 

Being the generous woman she is, Karen's also offering up her copy of the pattern - Simplicity 5599 - to one lucky reader! Leave a comment below if you'd like to be in with a chance of winning and I'll announce the randomly-chosen winner next Friday 25 January. 

Next Sunday, I have a lacey delight from Paunnet that will make your heart sing...for real!